
To change your Google Voice number, go to the Google Voice settings and select ‘Change’ under your current number. Follow the prompts to complete the process.
Changing your Google Voice number can be a straightforward task if you follow the correct steps. Google Voice offers a convenient way to manage your calls and messages, but sometimes you might need to update your number. Whether you’ve moved to a new location, want a different area code, or simply prefer a fresh start, changing your Google Voice number is achievable in a few simple steps.
This guide will help you through the process, ensuring a smooth transition. By following these instructions, you can easily update your contact information and continue enjoying the benefits of Google Voice without any interruptions.
Credit: www.alphr.com
Prerequisites
Before you change your Google Voice number, make sure you have everything ready. This section covers the essential prerequisites to ensure a smooth process.
Active Google Account
First, you need an active Google account. Without it, you cannot access Google Voice services. Make sure your Google account is up-to-date.
To verify your account:
- Open your browser.
- Go to Google Accounts.
- Log in with your credentials.
If you don’t have a Google account, create one here.
Current Google Voice Number
Ensure you have a current Google Voice number. This is necessary to switch to a new number.
To find your current number:
- Open the Google Voice app.
- Log in with your Google account.
- Check the number displayed on the dashboard.
Take note of this number. You will need it during the change process.
Having these prerequisites ready will make the process easier. Ensure both your Google account and current number are accessible.
Credit: www.androidpolice.com
Accessing Google Voice
Google Voice is a versatile tool for managing calls and messages. Follow these steps to access Google Voice and change your number. The process is simple and quick.
Logging In
First, open your web browser and go to the Google Voice website.
You will need to log in using your Google account credentials. Ensure you use the account linked to your Google Voice number.
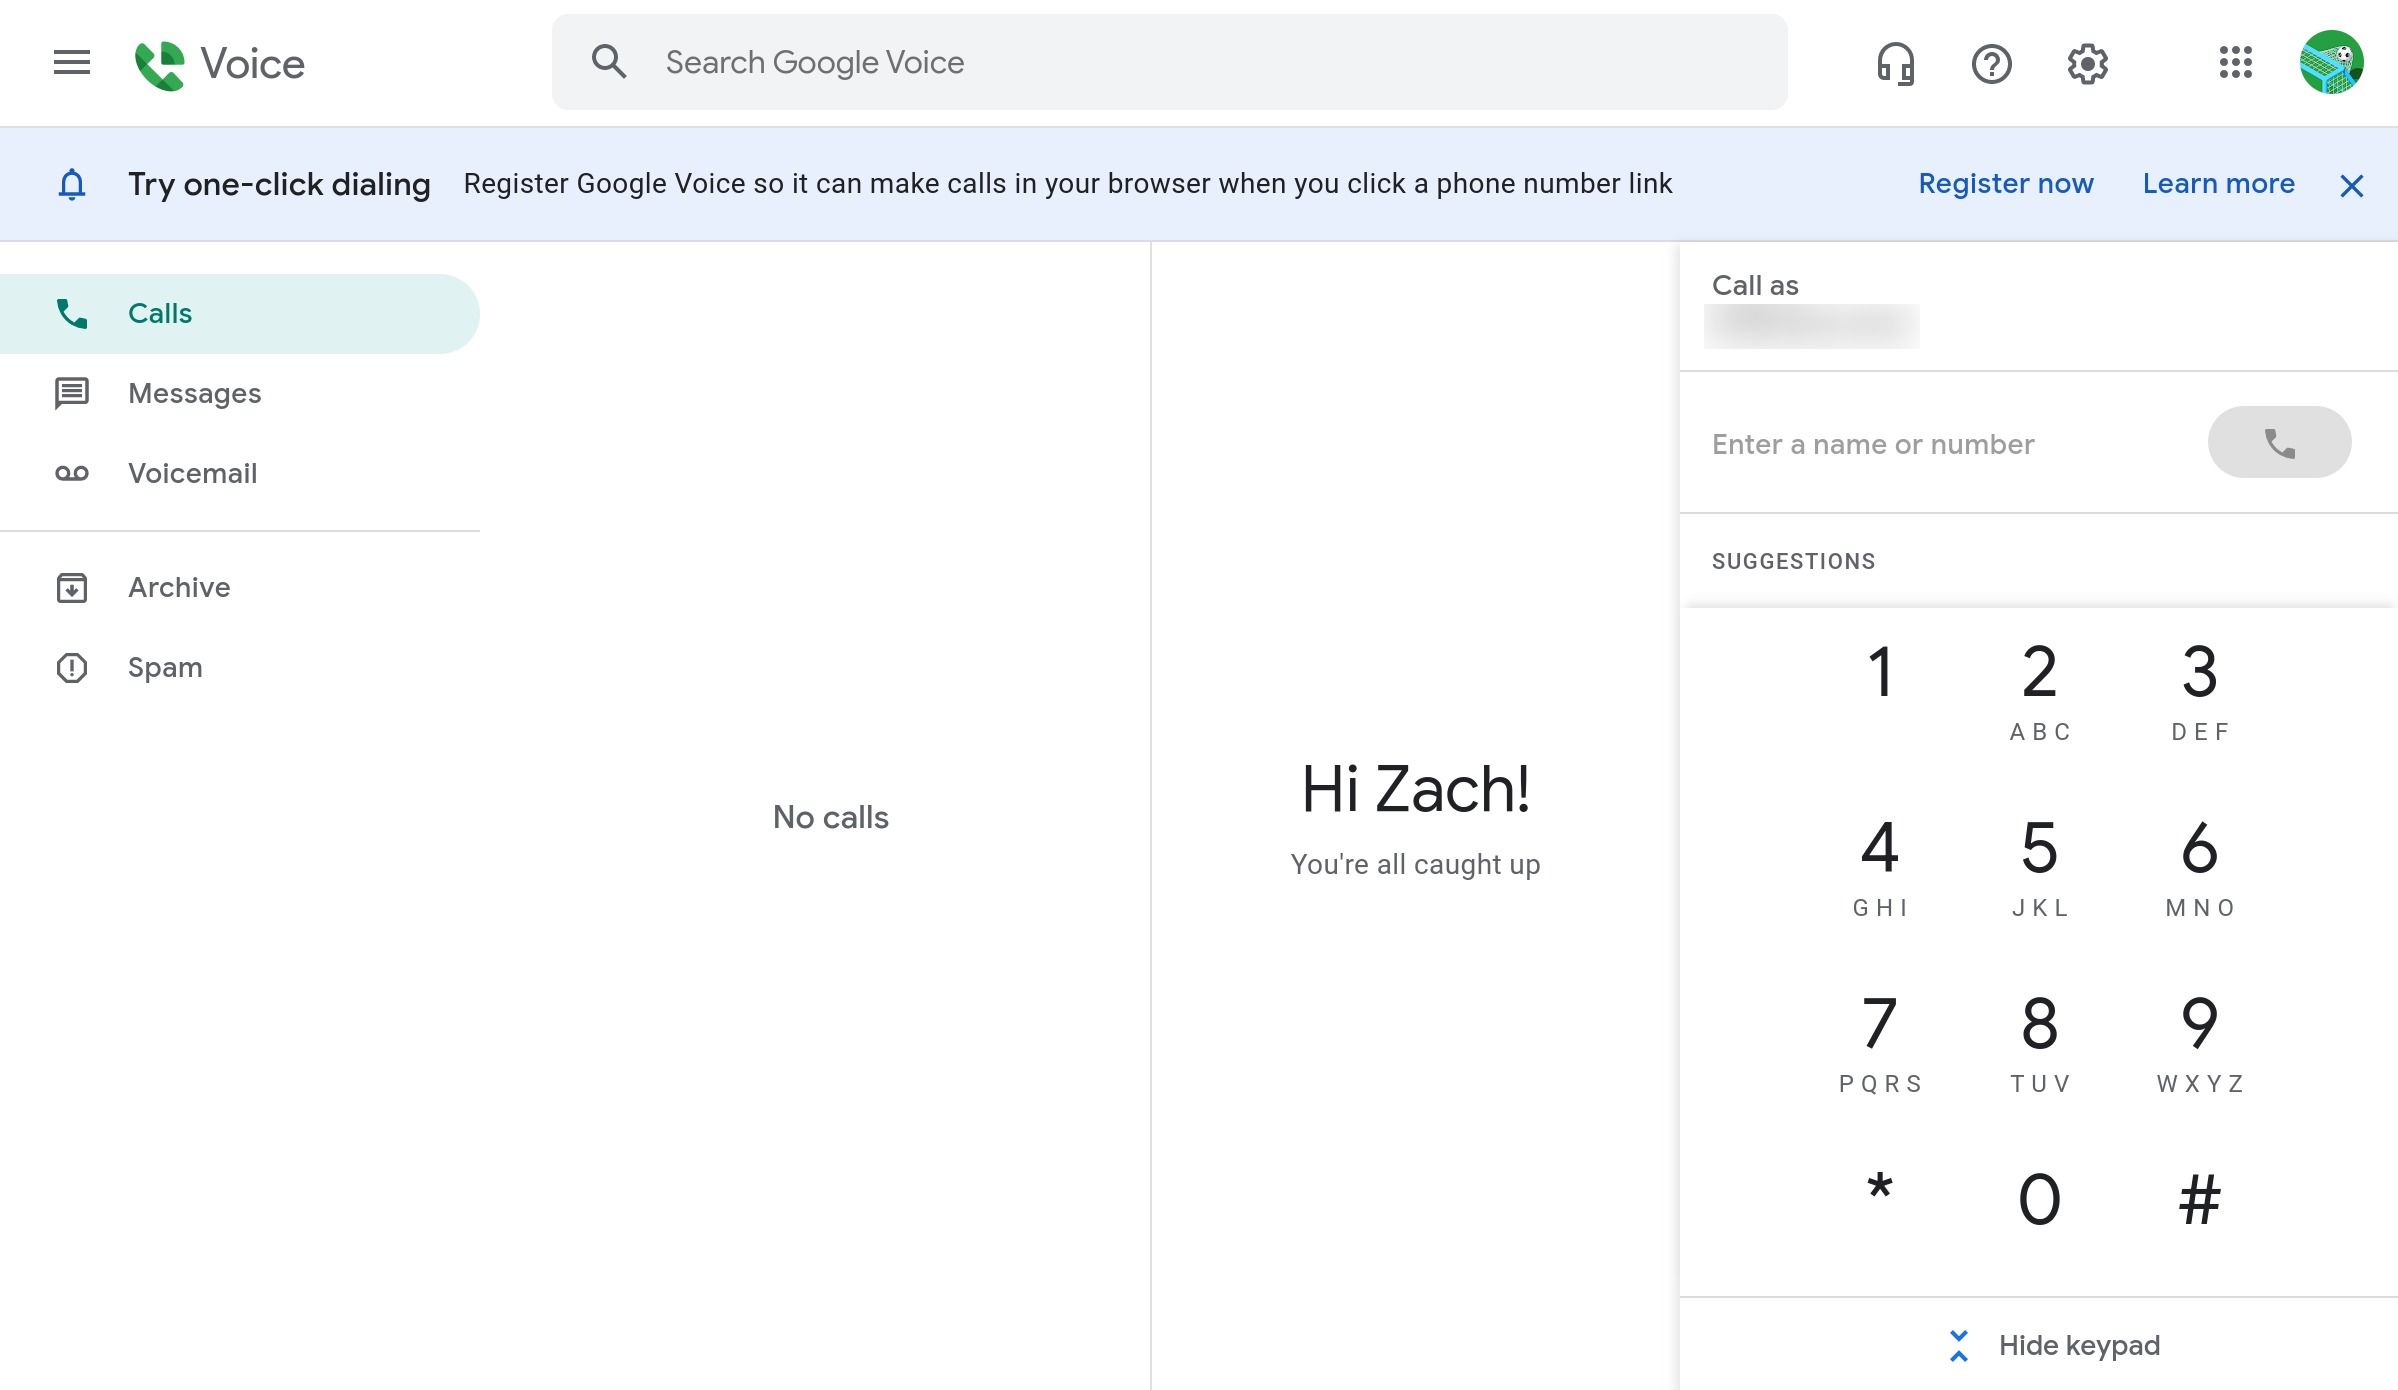
After logging in, you will see the Google Voice dashboard.
Navigating To Settings
To change your Google Voice number, you need to go to Settings.
Click on the gear icon at the screen’s top right corner. This will open the Settings menu.
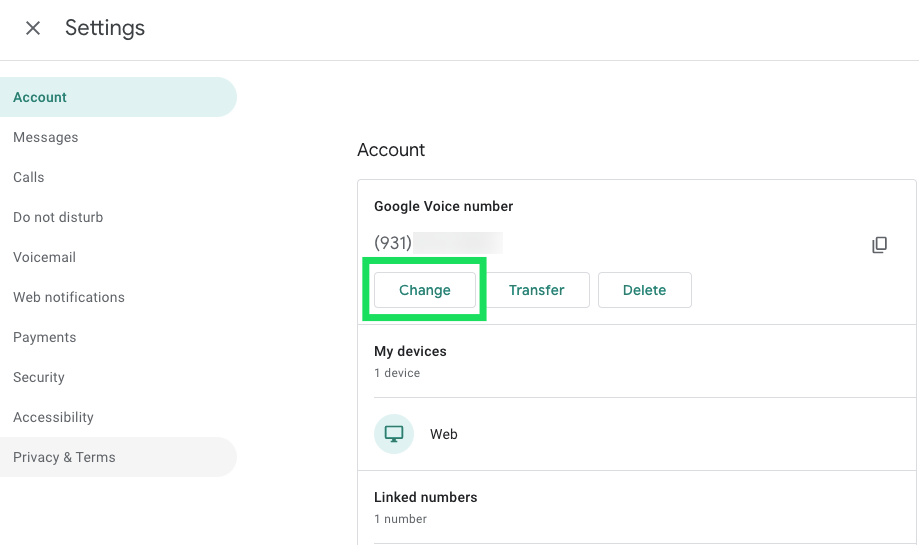
In the Settings menu, find and click on the Account tab.
| Step | Action |
|---|---|
| 1 | Open Google Voice website |
| 2 | Log in with your Google account |
| 3 | Click on the gear icon |
| 4 | Select the Account tab |
In the Account tab, you will see an option to Change your number. Click on it to proceed.
Follow the on-screen instructions to complete the process.
Initiating The Change
Changing your Google Voice number can seem tricky. But it’s simpler than you think. This section will guide you through initiating the change. Follow these steps to make the switch seamless and stress-free.
Finding The Change Option
First, open the Google Voice website on your computer. Sign in with your Google account. Once signed in, locate the Settings icon, usually represented by a gear.
Click on the Settings icon. A new menu will appear. Look for the Account tab. Under the Account tab, you will find the Change option next to your current Google Voice number.
Starting The Process
Click on the Change option. A new window will pop up, offering you a list of available numbers. You can search for a number by city or area code. Select your preferred number from the list.
Once you choose a number, click on Select. A confirmation screen will appear. Review the details carefully. If everything looks good, click on the Proceed button. You will be asked to confirm your choice one last time.
After confirming, the new number will be assigned to your Google Voice account. The process is quick and straightforward. You can start using your new number immediately.
Choosing A New Number
Choosing a new Google Voice number can be an exciting process. It allows you to customize your contact information to better suit your needs. This guide will help you navigate the steps involved in selecting a new number.
Area Code Selection
One of the first steps is selecting your preferred area code. Your area code helps identify the geographic region of your number. Consider whether you want a local or a different area code. A local area code makes your number familiar to nearby contacts. A different area code can make your number appear more unique.
Here’s a quick guide to selecting your area code:
- Identify the area code you want.
- Check if that area code is available.
- Consider the regional implications of the area code.
Available Number Options
Once you’ve chosen an area code, you’ll see a list of available numbers. Google Voice offers multiple number options for each area code.
To pick the best number, consider these tips:
- Choose a number that is easy to remember.
- Avoid sequences that can be easily misdialed.
- Consider patterns or repeating digits for simplicity.
Here is a sample table of available number options:
| Area Code | Available Numbers |
|---|---|
| 123 | 123-456-7890, 123-555-1234, 123-888-0000 |
| 456 | 456-321-0987, 456-666-4321, 456-777-1111 |
Make sure you pick a number that aligns with your personal or business needs. This number will represent you in communications, so choose wisely.
Confirming The Change
After you’ve decided to change your Google Voice number, the next step is to confirm the change. This process ensures that you have full control over your new number. Follow these steps to make sure everything goes smoothly.
Verification Process
The first step in confirming your new Google Voice number is verification. Google needs to verify that the new number belongs to you. Here’s how you can do it:
- Log in to your Google Voice account.
- Navigate to the settings menu.
- Select “Change Google Voice Number.”
- Enter the new number you wish to use.
- Google will send a verification code to the new number.
- Enter the verification code in the provided field.
By entering the code, you confirm that you have access to the new number.
Final Confirmation
Once the verification code is entered, you need to confirm the change. This step finalizes the switch to your new Google Voice number.
- Review the new number details.
- Ensure all information is correct.
- Click on “Confirm” to finalize the change.
- You will receive a confirmation email from Google.
After clicking “Confirm,” your new number will be active. You can start using it for calls and texts immediately.
Remember to update your contacts with your new number. This ensures they can reach you without any issues.
Fees And Charges
Changing your Google Voice number involves some fees and charges. Understanding these costs helps you make an informed decision. Below we break down the costs and payment methods involved in changing your Google Voice number.

Cost Breakdown
Changing your Google Voice number costs $10. This fee applies each time you change your number.
| Action | Cost |
|---|---|
| Change Google Voice Number | $10 |
Payment Methods
Google accepts various payment methods for changing your Google Voice number. Ensure you have a valid payment method linked to your account.
- Credit Cards
- Debit Cards
- Google Wallet Balance
- PayPal
Using these methods, you can quickly pay the $10 fee and change your Google Voice number.
Updating Contacts
Changing your Google Voice number is easy. Updating your contacts ensures seamless communication. Let’s dive into the steps for notifying important contacts and setting up automated messages.
Notifying Important Contacts
Informing key contacts about your new number is crucial. Here’s how to do it effectively:
- Family and Friends: Send a group message or email.
- Work Contacts: Change your number in your email signature.
- Service Providers: Log in to your accounts and update your contact info.
- Social Media: Update your phone number in your account settings.
Automated Messages
Automated messages can help inform contacts you missed. Setting up an automated message ensures no one is left out.
| Step | Description |
|---|---|
| 1 | Open Google Voice settings. |
| 2 | Navigate to the “Voicemail” tab. |
| 3 | Record a new voicemail greeting with your new number. |
| 4 | Save and activate the new greeting. |
Automated messages ensure everyone knows your new number. This avoids missed calls and messages.
Syncing Devices
Syncing your Google Voice number across devices ensures you never miss a call or message. Whether on your phone or computer, staying connected is crucial. Here’s how to sync Google Voice on mobile devices and desktop computers.
Mobile Devices
To sync your Google Voice number on your mobile device, follow these steps:
- Open the Google Voice app on your phone.
- Tap the menu icon (three horizontal lines) in the top-left corner.
- Select Settings from the menu.
- Under Account, tap on Devices and numbers.
- Ensure your mobile number is listed and verified.
Once synced, calls and texts will appear on your mobile device. Ensure you have a stable internet connection for smooth syncing.
Desktop Computers
Syncing your Google Voice number on a desktop computer is simple. Follow these instructions:
- Visit the Google Voice website using your browser.
- Sign in with your Google account.
- Click the gear icon (settings) in the top-right corner.
- Select Account from the settings menu.
- Ensure your devices are listed under Linked numbers.
With your number synced, you can make and receive calls directly from your desktop. This feature is perfect for those who work on their computers frequently.
Syncing devices helps keep all your communications in one place. Whether you use a mobile device or a desktop computer, staying connected with Google Voice is seamless and easy.
Troubleshooting
Changing your Google Voice number can be tricky sometimes. If you face issues, don’t worry. This section covers common problems and how to get help.
Common Issues
People often encounter these problems while changing their Google Voice number:
- Number Not Available: The chosen number might be unavailable.
- Verification Failure: The system fails to verify your phone.
- Account Issues: Problems with your Google account.
Follow these steps to solve these issues:
- Check Number Availability: Make sure the number is not taken.
- Verify Phone: Use a valid phone number for verification.
- Update Account: Ensure your Google account details are correct.
Customer Support
If the issues persist, contact Google Voice support. Here’s how:
| Method | Steps |
|---|---|
| Email Support | Send an email to the support team. Explain your issue clearly. |
| Help Center | Visit the Google Voice Help Center. Search for troubleshooting tips. |
| Community Forums | Join Google Voice forums. Ask questions and get advice from other users. |
Getting support is easy. Just choose the method that suits you best.
Credit: www.businessinsider.com
Maintaining Privacy
Changing your Google Voice number can help you maintain your privacy. This is especially true if you are tired of spam calls or want to keep your personal number secure. Here’s how you can manage your old number and adjust your privacy settings to ensure that your information stays protected.
Managing Old Number
Once you change your Google Voice number, your old number will be replaced. But, what happens to your old number? Here’s what you can do:
- Notify your contacts: Inform your important contacts about the change.
- Backup messages: Save any important messages or voicemails.
- Update services: Update your new number on online services and accounts.
| Action | Details |
|---|---|
| Notify Contacts | Send a message to your key contacts. |
| Backup Messages | Save important messages before changing. |
| Update Services | Change your number in all your accounts. |
Privacy Settings
After changing your Google Voice number, it’s crucial to review your privacy settings. Here are some tips:
- Check visibility: Ensure your new number is not publicly visible.
- Review permissions: Control which apps can access your new number.
- Enable filters: Use spam filters to block unwanted calls.
Adjusting these settings can help keep your personal information safe. Stay vigilant and regularly review your privacy settings.
Transferring Data
Changing your Google Voice number is simple. Transferring data ensures you don’t lose important information. This section will guide you on transferring voicemails and text messages.
Voicemails
Voicemails hold important messages. To save them, you can follow these steps:
- Open Google Voice on your computer.
- Go to the voicemails tab.
- Select the voicemail you want to save.
- Click on the three dots menu.
- Choose “Download” to save the voicemail to your device.
Repeat this for each voicemail you want to keep. This way, all your important messages will be saved.
Text Messages
Text messages also carry essential information. Follow these steps to save them:
- Open Google Voice on your computer.
- Go to the messages tab.
- Select the conversation you want to save.
- Click on the three dots menu.
- Choose “Print” to save as a PDF.
Print each conversation you need to keep. This method ensures all your text messages are safe.

Changing your Google Voice number can be crucial for privacy. But it also means you need to reconfigure various apps linked to your old number. This guide will help you reconfigure your messaging and social media apps quickly and efficiently.
Messaging Apps
Updating your new Google Voice number in messaging apps ensures you don’t miss important conversations. Follow these steps for popular messaging apps:
- WhatsApp: Open WhatsApp. Go to Settings > Account > Change Number. Enter your old and new numbers.
- Signal: Open Signal. Go to Settings > Account > Change Phone Number. Enter your new number.
- Telegram: Open Telegram. Go to Settings > Phone Number. Click Change Number and follow the prompts.
Each app has a slightly different process. Make sure to follow the specific steps for each one.
Social Media
Your social media accounts often use your phone number for security and account recovery. Updating your number is essential to keep your accounts secure.
- Facebook: Go to Settings > Mobile. Click Add another mobile number and enter your new number. Remove the old number if needed.
- Twitter: Go to Settings and Privacy > Account > Phone. Click Update Phone Number and enter your new number.
- Instagram: Go to Settings > Account > Personal Information. Enter your new number in the Phone Number field.
Make sure you also verify your new number for added security. This will ensure you receive important notifications and recovery options.
| App | Steps to Update Number |
|---|---|
| Settings > Account > Change Number | |
| Signal | Settings > Account > Change Phone Number |
| Telegram | Settings > Phone Number > Change Number |
| Settings > Mobile > Add another mobile number | |
| Settings and Privacy > Account > Phone > Update Phone Number | |
| Settings > Account > Personal Information > Phone Number |
Testing New Number
After changing your Google Voice number, it’s essential to test it. This ensures it works perfectly for both making and receiving calls and messages.
Making Test Calls
Testing your new Google Voice number by making a few test calls is crucial. Follow these steps:
- Open the Google Voice app on your device.
- Dial a known number, like a friend or family member.
- Verify the call connects and the audio quality is clear.
During these calls, pay attention to:
- Clarity of the voice.
- Any delays or disturbances.
- Proper display of your new number on the recipient’s phone.
Repeat this process a few times to ensure consistency.
Receiving Test Messages
Receiving messages is just as important as making calls. Here’s how to check:
- Ask a friend to send you a test message.
- Open the Google Voice app and check for the message.
- Ensure the message arrives promptly and is readable.
Check for the following:
- Timeliness of message delivery.
- Correct display of sender’s information.
- Readability and formatting of the message.
By performing these tests, you can be confident your new number works correctly.
Backup Options
Changing your Google Voice number is a simple process. But it’s essential to back up your data first. This ensures you don’t lose any valuable information. Here are some effective backup options.
Exporting Data
Exporting your Google Voice data is straightforward. Follow these steps:
- Go to Google Takeout.
- Select Google Voice from the list.
- Choose your preferred export format.
- Click on the “Create Export” button.
Google will process your request. You will receive an email once the export is complete. This exported file will contain all your messages and call logs.
Cloud Storage
Using cloud storage is another excellent backup option. Here’s a step-by-step guide:
- Sign up for a cloud storage service like Google Drive or Dropbox.
- Download your exported Google Voice data.
- Upload the exported file to your cloud storage account.
Cloud storage ensures your data is safe and accessible from anywhere. It’s easy to share and manage your files in the cloud.
Security Tips
Changing your Google Voice number can enhance your privacy. But securing it is crucial. Here are some essential security tips to keep your Google Voice number safe.
Two-factor Authentication
Enable Two-Factor Authentication (2FA) for added security. 2FA adds an extra layer of protection. This means you need your password and a second form of verification. You can use a text message or an authentication app.
- Go to your Google account settings.
- Navigate to the “Security” section.
- Enable 2FA and follow the instructions.
2FA makes it harder for hackers to access your account. Always use it where available.
Password Management
A strong password is vital for securing your Google Voice number. Avoid common passwords and use a mix of characters.
Here are some tips for creating a strong password:
| Do | Don’t |
|---|---|
| Use a mix of letters, numbers, and symbols. | Use personal information like birthdays. |
| Make it at least 12 characters long. | Use common words or sequences. |
Use a password manager to store and manage your passwords. A password manager can generate strong passwords for you. It also keeps them secure in one place.
Remember to change your passwords regularly. This keeps your account safe from breaches.
User Experiences
Changing a Google Voice number can be smooth or challenging. Users share their experiences. These stories offer insights into what you might expect.
Success Stories
Many users have successfully changed their Google Voice number. Some did it to get a local number. Others wanted a memorable number for business.
- John’s Experience: John found the process easy. He followed the steps on Google’s site. Within minutes, he had a new number.
- Lisa’s Story: Lisa needed a number with her area code. She changed her number without any issues. Now, her clients can reach her locally.
Challenges Faced
Not all users had a smooth experience. Some faced challenges during the process. Here are a few common issues:
- Verification Problems: Some users faced verification issues. They couldn’t verify their new number. This delayed the process.
- Number Availability: Finding a specific area code was tough for a few users. They had to settle for less preferred numbers.
- Technical Glitches: Some experienced technical glitches. These glitches caused delays and required support intervention.
| Challenge | Solution |
|---|---|
| Verification Issues | Ensure accurate information and retry verification steps. |
| Number Availability | Be flexible with area code preferences. |
| Technical Glitches | Contact Google Support for help. |
Additional Resources
Changing your Google Voice number can be complex. Fortunately, several additional resources can assist you. These resources help you navigate the process smoothly.
Help Center Links
The Google Voice Help Center is a valuable resource. It offers detailed guides and FAQs. You can find step-by-step instructions to change your number. Access the Help Center anytime for quick answers.
| Resource | Description |
|---|---|
| Google Voice Help Center | Comprehensive guides and FAQs. |
| Google Accounts Help Center | Assistance with account-related issues. |
Community Forums
The Google Voice Community Forums are another excellent resource. Here, you can ask questions and share experiences. Community members and experts often provide useful tips and solutions.
Forums help you connect with others facing similar issues. You can also browse through previous discussions for insights.
Frequently Asked Questions
How To Change Google Voice Number?
To change your Google Voice number, log in to your account. Go to Settings. Under “Account,” select “Change/Port. ” Follow the prompts.
Can I Pick A Specific Google Voice Number?
Yes, you can choose a specific number. When changing your number, you’ll have options to select from available numbers.
Is There A Fee To Change Google Voice Number?
Yes, changing your Google Voice number is a $10 fee. Ensure your payment method is updated.
What Happens To Old Google Voice Number?
Your old number will be kept for 90 days. After that, it will be released and could be reassigned.
Conclusion
Changing your Google Voice number is straightforward with the right steps. Following this guide ensures a smooth process. Keep your contacts updated to avoid any confusion. Regularly review your settings for optimal use. Stay informed and make the most of your Google Voice experience.
Happy calling!